On This Page:
- Crown Molding Installation – Step-by-Step
- What You Should Know if You Hire
- More on Different Types of Crown Molding
- More on Cutting Corners and Angles
When it comes to adding value and style to your home, sometimes it’s the little details — as much as the large renovations — that truly make an impact in transforming a room from a stale box to a textured palace with a more finished, luxurious feel.
Although many modern and newer style homes are simple and stripped-down, ready for further personalization after the builders finish them, adding those little touches and craftsman elements is easier and cheaper than it seems. In fact, installing crown molding, though an exact and specific art, isn’t an expensive one and something a truly dedicated amateur carpenter can accomplish.
Provided you already own the tools, the materials you require to install crown molding yourself cost as little as little as $1–$3 per linear foot. With skill, it’s also a DIY project you can finish inside of a day. Even hiring a pro to add this sort of aesthetic touch is less expensive than it seems, with most homeowners paying between $3 and $8 per linear foot for a job that takes just a couple of hours.
Ultimately, whether you want to tackle the project yourself or are considering hiring a pro, understanding the ins and outs of molding installation is important when deciding on the decor and the little details you want to add to your home. This guide helps you balance the skills and patience needed to install your own crown molding with the cost of hiring a pro and ultimately decide how to make a real impact in any room of your home with an elegant touch.
Crown Molding Installation
In theory, the installation of crown molding is pretty straightforward, paralleling other trim installation techniques such as those of baseboards, windows and doors. However, it’s also important to take into account the unique features and characteristics of molding, including how it sits on the wall and how it must be angled in order to have a clean, professional result.
Here are the basic steps that you must take to do just that:
- Choose Your Molding
Crown molding comes in a variety of styles that range from simple MDF (Medium-density fibreboard) designs that cost as little as $1 per linear foot to intricate wood designs that can cost $45 or more per linear foot. MDF is also easier to paint. If you’re a first-time DIY installer, opting for less-expensive materials is usually best because waste is common as you master the unique cuts needed for installation.In addition, it’s important to choose a molding design that’s in line with the decor and architecture of your home. Older homes and period homes, for example, are best suited to more ornate designs, while modern or midcentury homes are better off with clean, simple lines that add depth. It’s also a good idea to match new crown molding to the styles of molding found elsewhere in your home, including baseboard and trim. Finally, be sure to consider the height of your ceilings. Higher ceilings can tolerate larger trim of 4”–6” or more, whereas standard 8-foot-tall ceilings are best suited to smaller widths of 3”–4”. - Measure the Space
Crown molding is designed to travel the entire perimeter of the room around the ceiling. You don’t need to get up on a ladder to find this measurement, however. Simply run a tape measure along the floor instead. Once you have the linear footage calculated, add on 15%–20% more to account for waste and mistakes. Increase this number for a first-time install to at least 25% to ensure you purchase enough molding. - Gather Tools and Other Materials
In addition to the molding itself, you need the following tools and additional materials:- Power Miter saw
- Coping saw
- File or sandpaper
- Laser level
- Chalk line
- Paintable caulk and caulk gun
- Rasp
- Drill
- Power nailer
- 4d, 6d and/or 8d finishing nails
- Carpenter’s glue
- Wood putty
- Cut Inside Corner Pieces
Corner pieces must be cut at 45-degree angles in order to fit into each space. Holding the molding upside down is key to getting each piece to fit together on the wall itself. For inside corners, you only need one piece cut at 45-degrees. The other can butt against the wall at 90-degrees. In order to get the two pieces to fit together, cope the back of the 45-degree piece to cut away the excess material and maintain the profile at a 45-degree angle. Once you cope the joint, the 45-degree piece should fit in snugly against the 90-degree piece on an inside corner. - Cut Outside Corner Pieces
For the outside corner, no coping is necessary. Instead, cut two pieces at opposing 45-degree angles, again taking care to cut them upside down. You can also use the opposing 45-degree angle method for inside corners as well; simply adjust the angle of the long point of the cut towards the ceiling (outside corner) or the floor (inside corner) accordingly. It’s important to note that the fit of mitered 45-degree cuts is not as tight as the coped cut for inside corners. Instead, these cuts require caulk to finish. - Draw a Guide to Attach the Molding to the Wall
Once all the cuts are made, have someone else help you hold the molding pieces up to the wall to draw up a guide. Be sure to press the molding into each other tightly so that the fit is secure and aesthetically pleasing. Once you’ve found that point, use a pencil to draw a line on along the bottom of the molding.Remove the molding and use a laser level to determine the angle of the ceiling — most aren’t perfectly straight or level. However, because you want your molding to appear straight from the bottom, it’s important to draw a guide across the wall, leaving a gap at the top that you can fill in with caulk or wood putty. - Find the Studs for Joists
Using a stud finder, locate all the wall studs and ceiling joists along the wall. Mark each with blue painter’s tape. Because all joists should connect at a stud, these marks serve as your measurements for cutting the straight pieces of molding, each of which is made at a 45-degree angle to form a lap joint.
- Attach the Molding
Begin at one corner and make your way around the room. Use a power nailer with 2-inch finishing nails to attach the molding at all the studs and ceiling joists. The use of a power nailer is important as it reduces fatigue, prevents hammer marks and eliminates the need for predrilling.At this point it’s also a good idea to add caulk or construction adhesive to each corner and lap joint prior to installation. In addition to creating a stronger bond, it ensures that the pieces firmly fit together and makes finishing easier. Just wipe away any excess with a wet paper towel once the piece of molding is secure on the wall. - Finish the Wall
Once the entire room is complete, add caulk to fill in the top areas, as described in Step 6, and hide the nails by adding a non-shrinking vinyl adhesive or wood putty to all nail holes. Be sure to tap in any nail heads that are protruding using a hammer and tamper.
What You Should Know If You Hire a Pro
Choosing to hire a pro to install crown molding is a good idea if you lack the time, skills and tools to do this project yourself. Though the materials for an averaged-size room with basic primed MDF crown molding may only cost about $100 or so, the skill and experience of a professional carpenter or contractor can save you a lot when it comes to time and frustration — especially if you want to install more ornate or expensive molding or decide to have custom molding designed and fabricated by a woodworker.
On average, homeowners pay between $645 and $1,561 for professional crown molding installation, with the size of room and type of molding making the largest impact on final price. Most professional installations are completed within one day.
Ready to start your crown molding?
Find ProsMore on Different Types of Crown Molding
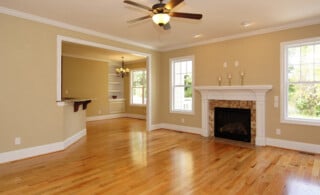
The term “crown molding” refers to the placement of the molding at the “crown” of a room or at the place where a ceiling and wall meet. It’s thus named because it creates a crown effect around the top of a room. The designs vary from the ornate and detailed to simple and minimalist, and each is meant to match the different aesthetics of homeowners and the architectural style of their homes. There are three broad types of molding styles that you may want to consider:
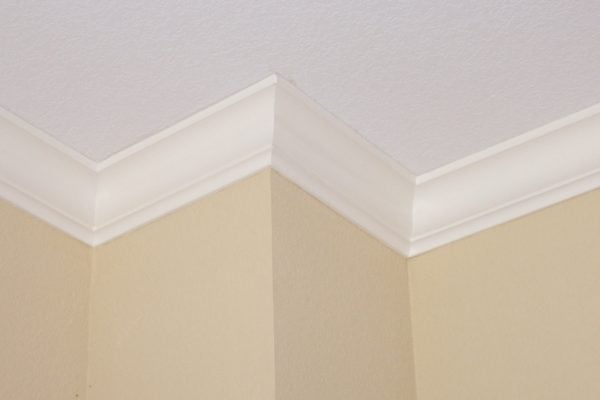
Basic Crown Molding
Basic crown molding can come in varying degrees of detail, but it usually includes the types of waves and ridges commonly found in baseboard and trim.
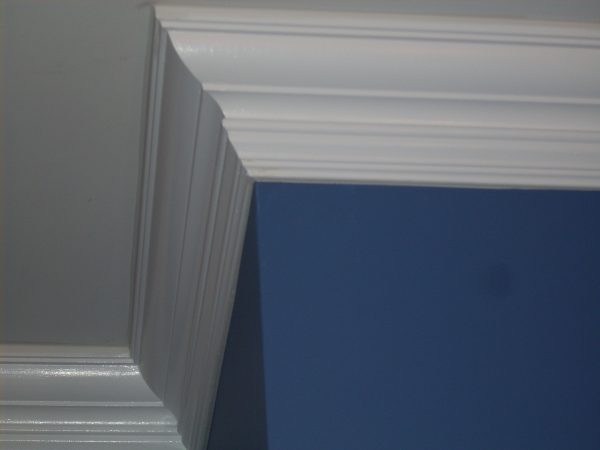
Concave Crown Molding
For a more minimalist look, cove molding offers a simple concave cutout that adds a more modern, subtle finish to a space.
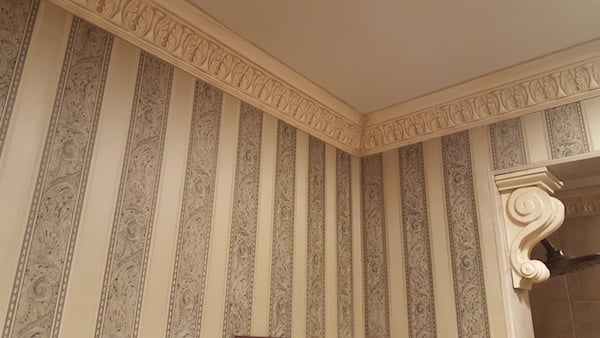
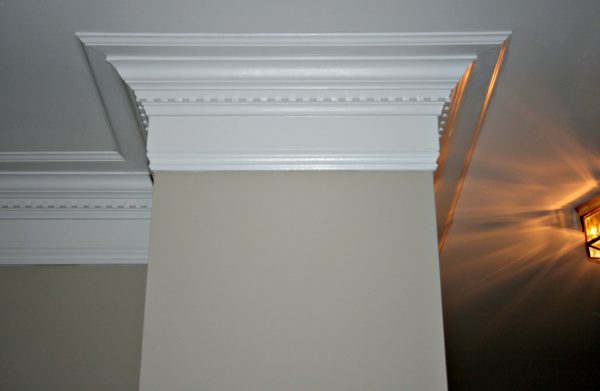
Dentil Crown Molding
Finally, dentil molding is far by more ornate and best suited to period homes where classical style and very traditional details are found throughout.
More on Cutting Corners and Angles
Unlike baseboard and flat trim, crown molding installation requires a more nuanced approach when it comes to cuts and angles. This is because the molding sits at a 45-degree angle, touching the surface of both the ceiling and the wall with hollow space behind it. Thus, cutting your crown molding corners is, by far, the most difficult part of this job, and many pros recommend practicing on inexpensive pieces to perfect your corners before completing the full project. Understanding the different cuts and corners you need to make is important, as are the following tips that help make cuts more natural.
Create a Guide Fence for the Miter Saw
Holding the molding upside down is the key to making cuts that actually fit together when placed on a wall. The easiest way to do this is to make a guide fence on the miter saw table that both creates a 45-degree angle for the cut and ensures that you make it in the right direction. To do this, begin by placing a piece of the molding upside down with the flat side of the molding that touches the wall resting upwards on the vertical fence of the saw and flat side of the top, which rests on the ceiling, pressed against the table. Secure these pieces in position with clamps.
Use a piece of scrap plywood that’s about 30 inches long and press it up against the clamped molding. Use additional clamps or hot glue to secure this scrap wood in place, creating a fence area to rest the molding when making cuts.
Understanding Scarf Cuts
Installing crown molding in large rooms is only possible by placing shorter pieces of molding up and joining them with a lap joint, secured to a wall stud. You create lap joints by making 45-degree scarf cuts on longer pieces of board and then fitting them together.
However, the manner in which you make these cuts matters, as it impacts their ability to connect on the wall. Therefore, when working counterclockwise around a room, your scarf joints should be cut at 45 degrees to the left. Whereas when working clockwise, cut them at 45 degrees to the right.
Coping Practice
Coped joints at the inside corners are far more finished and professional looking, but they require a lot of practice to complete. Pros recommend buying smaller pieces of molding and practicing your coping before committing to an entire room. To do this, start with a piece cut at a 45-degree angle. Then, following the design of the molding itself, cut away the excess material at the back of the piece to make it fit into another piece of molding, which will be butted against the corner at 90 degrees. After coping, the cut itself will look rough. To smooth it out, use a file or sandpaper.
 Guide to Repairing Drywall Cracks & Holes
  How to Remove a Textured Drywall Ceiling
 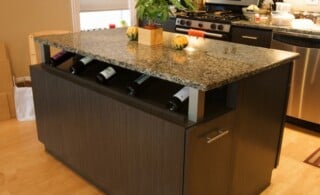 A Guide to Building an Affordable Kitchen Island
  DIY Guide: Replacing a Washer Pump
  Building a Pergola: A Guide to Building Your Own or Hiring a Pro

Are You Familiar With This Topic? Share Your Experience.