Reviewed by Bob Tschudi,
Expert Home Building and Remodeling Contributor.
This guide will teach you how to cut laminate flooring. There are several steps to protecting your floors and ensuring the final product looks correct. If you don’t have experience using the required tools, you should contact a flooring professional. It’s easy to hurt yourself and others, or to damage the material if you haven’t previously worked with the tools involved. “Laminate flooring is very delicate,” says Bob Tschudi, a Raleigh, NC-based GC. “Unlike hardwood flooring, it is unforgiving. So you need to spend more time planning than cutting.”
On this Page
- Best Tools for Cutting Laminate
- DIY vs. Hiring a Pro
- Cutting Without Chipping
- Working With Tile
- Cutting Flooring That’s Already Installed
- Trim/Edging
- Full Installation & Repairs
Best Tools
Not all tools are made equal. Many are designed to perform different functions, which means some are more useful when working with laminate flooring than others. When shaping this material, you want to make precise cuts.
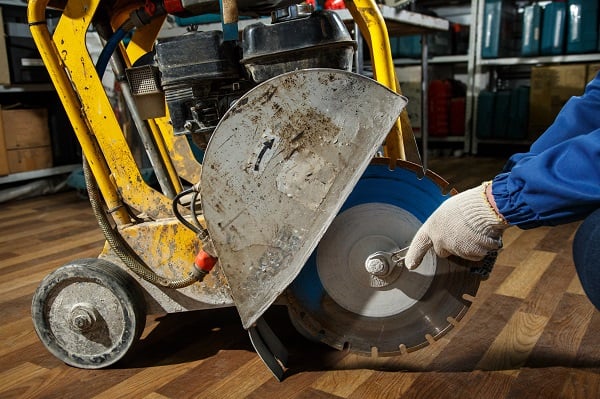
Of the saws available, the most useful are table and circular saws because they are easier to control and were designed to create these incisions. These tools can also rip cut, which means making straight cuts parallel with the grain.
Below are some of the most common tools available for shaping laminate and whether they are useful for your project.
Table Saw: $90–$200
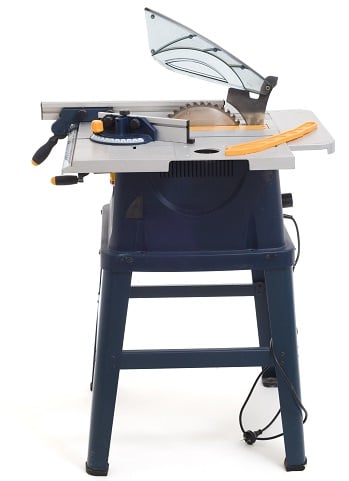
This is one of the best tools for this project. Unlike others, this comes with a built-in table to hold the board while you slice. It also uses an attached, circular saw and is designed to make straight cuts, ensuring your material is even.
To use one, you want to remain steady, make sure the plank line is perpendicular to the blade, keep your hands away from the saw, and wear the proper safety equipment. You should have goggles, gloves, and a dust mask to avoid getting shavings in your face. If you cannot handle the force generated by the saw, you should hire a contractor.
Circular Saw: $40–$125
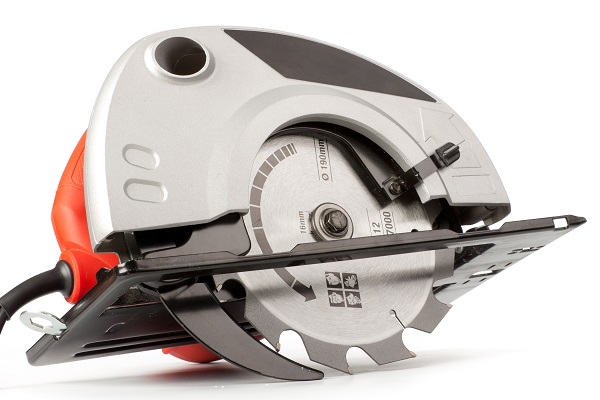
A circular saw is an electric saw that spins quickly and makes straight cuts. It is one of the best tools to use when shaping laminate and can be held in one hand, although a stand should be used to hold materials in place. “The circular saw is the greatest invention ever made for the contractor,” says Bob Tschudi. “I’ve watched talented subcontractors cut everything from heavy doors to delicate trim with a circular saw, and the results were impressive.”
Like with others, you want to keep your hands steady and away from the blade. You should make sure you are slicing on a steady surface and that you can handle the force of the saw.
Handsaw: $15–$75
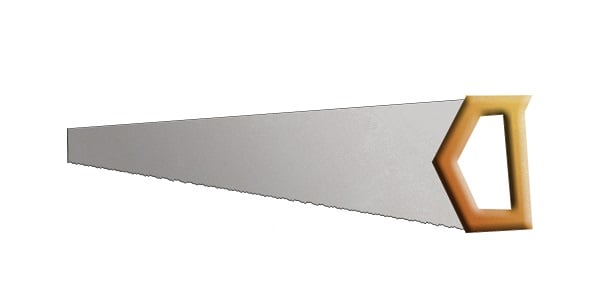
Also called the plank saw, this is what most people imagine when they hear the word “saw.” This tool is easy to use, but is not good for laminate boards. Unlike electric saws, you are completely in control of the direction of the blade. If you adjust the angle of your hand, even slightly, then your straight cut can become crooked.
Miter Saw: $90–$150
A miter saw is another electric tool. This one is designed so the user can pull the saw back and then slice down, and it is normally used to make cross-cuts. Like some options, this tool is not recommended for shaping your material because it isn’t great for making straight edges.
Jigsaw: $25–$100
Jigsaws are powerful tools with a vertical saw. The main reason they shouldn’t be used when slicing laminate is that they are not designed for straight cuts. Instead, most professionals use jigsaws to make angles and curves.
Multi-Tool: $25-$90
A multi-tool uses an oscillating blade to cut. While slower than other cutting tools, it’s a great tool to get a straight line.
Without a Saw
A utility knife ($20–$50) can be used if a saw is not present. Begin by donning gloves, goggles, and a dust mask. Then, mark the material where you want the edges. Finally, drag the blade along that line.
Like some other options, you need to be careful when using one because you might not make straight cuts. This may not be the best alternative if your blade is not sharp or becomes dull quickly.
Some DIY sites suggest scissors to separate your materials, but this process is not recommended unless your scissors have been recently sharpened and you can hold them and the planks straight.
DIY vs. Hiring a Pro
Considering the hazards of using electric saws, hiring a professional when you don’t have experience can save you in the long run. In addition to the possibility of hurting yourself, it’s easy to damage the flooring if you make the wrong incision.
Another common problem is that laminate is a harsh material to shape. Many saws, unless they are high-end and have hardened blades, will dull quickly during the process and become weaker and more dangerous. Hardened saws are expensive and typically only owned by carpenters and other professionals who work with these materials frequently.
Professionals will bring their own tools and will often install the flooring as well as cut it. Their work can save you money in the long run because they are less likely to make mistakes, and you won’t have to invest in the cost of the tools above. DIY work can be financially beneficial when done correctly, but a lack of experience means errors are likely. Many homeowners wind up needing to repurchase materials due to mistakes, which can lead to a significantly extended installation period.
Ready to start your Laminate Floor Cutting & Installation?
Find ProsReturn to Top
How to Cut Floor Boards Without Chipping
Laminate boards can chip if separated incorrectly. To avoid this, follow these steps when cutting your new flooring. This process can take up to two hours, depending on how many boards you need to cut.
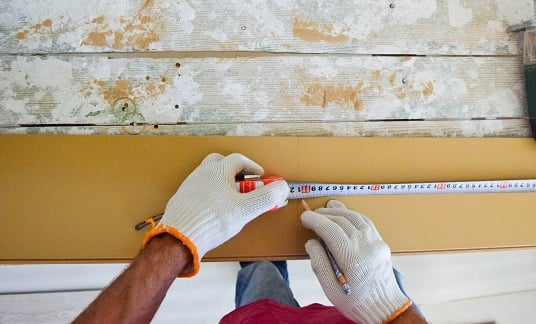
- Mark and measure where you want to cut the boards beforehand with chalk or pencil.
- Keep your board in place using a stand or a clamp.
- Wear goggles, a mask, and gloves.
- Use a table or circular saw to make long, straight cuts. For angles, use a utility knife or a jigsaw.
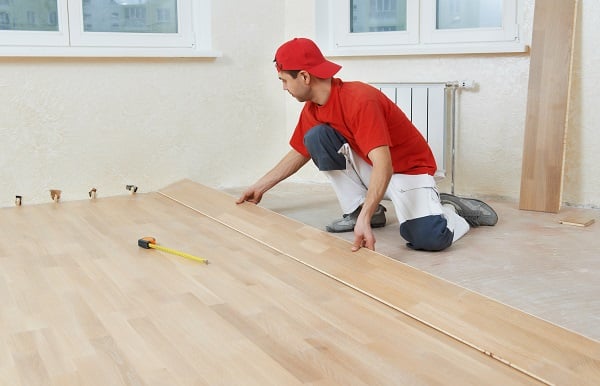
Cutting Lengthwise
When you want to cut the material lengthwise, follow the same steps written above. Just make sure you have clamps or a stand that can hold both ends of the board so that you can make the slice without the boards falling or moving.
How to Cut Laminate Tile
Like board flooring, tile should be shaped in straight lines using the proper safety equipment.
- Wear goggles, a dust mask, and gloves.
- Use a pencil or chalk to mark where the line you want to separate the board.
- Place the tile on a stand or hold it steady with clamps.
- Use a utility knife to make long incisions instead of a saw.
Cutting Flooring Already Installed
If you have already installed laminate but realize you need to make another slice, be careful. The process is simple and possible, but it is easy to accidentally damage the subfloor below. Consider enlisting the help of a professional.
- Mark the material with a pencil or chalk.
- Put on goggles, a dust mask, and gloves.
- Adjust the circular saw blade so it is almost the thickness of the board, but not quite. You want to be slightly thinner to avoid slicing the subfloor.
- Make swift, clean incisions and keep extra materials on hand if you make a mistake.
Ready to start your Laminate Floor Cutting & Installation?
Find ProsReturn to Top
Working With Trim/Edging
The only major consideration you need to take when working with trim and edging is that you need to leave space between the laminate and the wall. Many DIY homeowners cut their flooring to fit the exact amount of space in the room but forget that there needs to be an area for the trim to be installed. Measure your trim and leave that amount plus an additional one-half inch so you have space for your materials. Afterwards, fill in remaining gaps.
Flooring Installation & Repair
If you don’t want to DIY this project, you can contact a professional who can do the cutting, installation, and repairs. Many professionals bring their own tools, which is convenient since the process of shaping the flooring requires more than one saw.
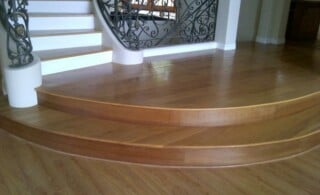
Contractors also have many years of experience and can work with more complicated areas, such as crooked rooms or stairs, which require making small pieces to fit along the edges.
If you want to hire a professional, you will find that the average price of laminate flooring installation is just under $3,000. However, the total cost can actually vary between $550 and $7,000 depending on the size and complexity of the area you would like to cover. These prices do not include the cost of the laminate, which you will often need to supply yourself. Most boards or tiles cost between $0.25 and $1.00 per square foot. For a space of 500 square feet, you would need to add $125 to $500 to the total installation cost. This means a professional installation can be anywhere between $675 and $7,500.
A DIY project costs between $2 and $8 per square foot, including the price of the materials. This means that a homeowner could spend between $1,000 and $4,000 to redo a room with 500 square feet of flooring space. Remember that one of the factors in the total price is the cost of the tools, which you will need to supply yourself and maintain.
Ready to start your Laminate Floor Cutting & Installation?
Find ProsReturn to Top
 Prefinished versus Unfinished Wood Flooring – Pros & Cons
  How to Remove Pet Odor From Your Carpets
  Radiant Floor Heating – How it Works & Benefits
  Is It Possible to Level a Bathroom Floor?
  Find the Perfect Flooring: The Pros, Cons and Costs of Top Flooring Materials

Are You Familiar With This Topic? Share Your Experience.