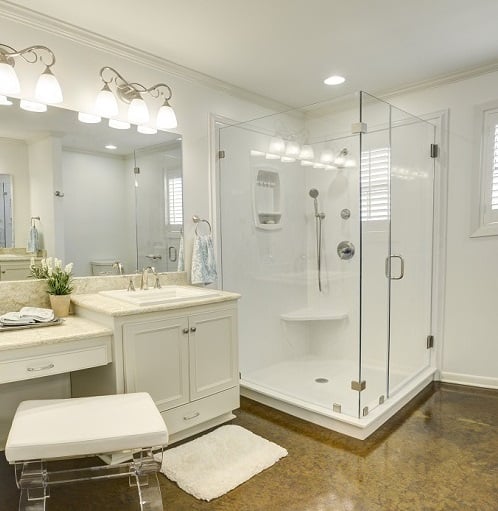
When plumbing and tile work is involved, bathroom renovations like installing a new tub or shower can be quite labor intensive. But for homeowners who want a faster, easier alternative to custom tile, prefabricated showers are great. Although the installation process for pre-fab bases does not differ from tile, it is lighter, faster, and less expensive. Prefabricated pans are typically made from acrylic or fiberglass. They come in a variety of sizes and shapes, although they lack the color range and high-end appearance of tile.
Having this done professionally comes with a price tag between $500 to $900. For DIYers, the project requires an intermediate skill level and averages $250 to $550. Installing a fiberglass or acrylic pan can usually be completed within four to six hours. Unless you have some plumbing experience, it is best to hire a local professional to get the job done quickly and correctly to minimize potential problems like mold and water damage.
On This Page:
Shower Pan Installation
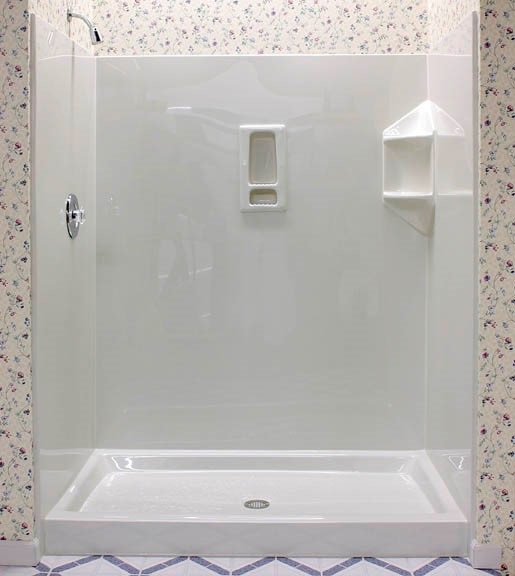
Most acrylic and fiberglass shower pans cost between $100 and $1,000. Fiberglass is less expensive, but more prone to color loss and scratching. Acrylic tends to be more durable, but it’s also pricier. In both cases, you can usually choose from several shapes, including round, square and rectangle, and base lengths of 24 to 75 inches.
Materials & Tools Needed
Aside from the cost of the pan itself, below are other necessary items you’ll need for installation.
- Power drill and bits
- Hammer
- Screwdrivers (Philips and flathead)
- Adjustable pliers
- Tape measure
- Level
- Caulking gun
- Silicone bath caulk
- Screws (usually 1.5-inch or 2-inch)
- Washers
- Shims
- Masking tape
- Framing square
- Cleaning supplies
Depending on whether you’re replacing an existing base or installing a new one, you might also need 2-inch pipe and a drain kit to add a shower liner (not to be confused with a curtain). Additionally, you might need backerboard, sealant, cement primer, and fixtures.
Preparing for Installation & Purchasing Your Pan
Whether you’ve chosen an acrylic or a fiberglass base, the preparation and installation of the shower pan remains the same, including measuring the space, cleaning, leveling, and dry-fitting the pan.
- With your tape measure, measure the area and note the shape of the space where you’re placing the new base, including all the walls that it will touch.
- Now that you know the dimensions of the space, you can purchase your fiberglass or acrylic pan. They typically come in standard sizes like 36”x36” and in limited colors like white or beige. Many home improvement stores and dealers can special order larger sizes and specialty colors.
- The next prep step is to clean and seal your surface. If it’s untreated, which is likely when working with a new shower, apply primer or a water sealant and allow it to dry according to manufacturer instructions.
- Once the area is completely dry, place the new shower pan into the space without any fasteners or adhesives to make sure it fits snugly and the drain cut out lines up correctly over the drain pipe.
- Put cardboard down and walk over the base to test it for stability, and follow all other manufacturer recommendations for leveling.
Steps to Install
Now that the area is prepped and you’re sure that everything fits correctly, you’re ready to move on to getting things permanently in place. To complete this project, there are four main considerations: Connecting the drain, leveling the base, attaching the new pan, and creating a watertight seal around it.
Drain Components
Most drain assemblies include a flange, drain pipe, gaskets, and a drain body. Test the drain flange to make sure it rests flush with the pan, adding an extension if needed. Otherwise:
graphic here showing step #1
- Apply primer and cement to the drain pipe and the flange.
- Attach them to the drain in the floor.
- Once the cement dries, put gaskets on the flange and place the pan over the drain.
- Use silicone to caulk the flange before lining up the drain body’s holes with the flange’s screw holes.
- Press the drain body into place.
- Attach the drain screen and screw it into place.
Leveling the Base
- For the water to drain correctly once the shower is in use, the base, which has an integrated slope to move water toward the drain, the floor must be perfectly level. Check that everything is still level before attaching the pan.
- Add shims to compensate for any sloping of the subfloor so that the acrylic or fiberglass pan sits level.
Attaching the Pan
- Mark the center of each side’s studs on the rim, and pre-drill holes at the designated marks.
- Screw or nail the pan into the stud with rustproof nails or screws.
- Check the level again. Test the base and plumbing connections for make sure everything works without leaking.
Caulking & Sealing
- Silicone bath caulk creates a tight, waterproof seal to finish things off. Caulk over any areas that you drilled, around the area where the studs and pan meet, and the joints where the floor and base join. Avoid caulking over the lip, or the caulk could prevent the shower walls from sealing correctly.
Ready to start your Shower Pan Installation?
Find ProsReturn to Top
How to Remove or Replace a Shower Pan
Sometimes refinishing a tub isn’t enough. If you have someone with mobility issues, switching from a tub to a shower might be your best option. Likewise, if you have an existing fiberglass base that’s cracked or leaking beyond repair, it’s time to replace it. The process for removing an existing fiberglass or acrylic pan and removing a tub for a tub to shower conversion is very similar:
- Cut the tub/pan and surround away with a reciprocating saw to remove it. Additionally, saw through the drainpipe that’s connected to the old base and remove it.
- Check the fit of the new pan to make sure it fits with the existing studs. If needed, add 1/2-inch plywood strips to give the floor extra clearance.
- Mark the new base’s drain hole on the subfloor, along with any areas where it overlaps the flooring.
- Scrape old caulking off with a putty knife.
- Chisel away any flooring that would be under the pan before attaching the drain hole’s strainer.
- Vacuum the subfloor and check the level. Shim as necessary.
- Put the new base in place and double check the level before securing it with galvanized screws and connecting the drainpipe to the shower pan’s strainer.
- Cover the walls with backerboard before adding the acrylic or fiberglass walls, or tiling.
Ready to start your Shower Pan Installation?
Find ProsReturn to Top

Installing a Base on Concrete
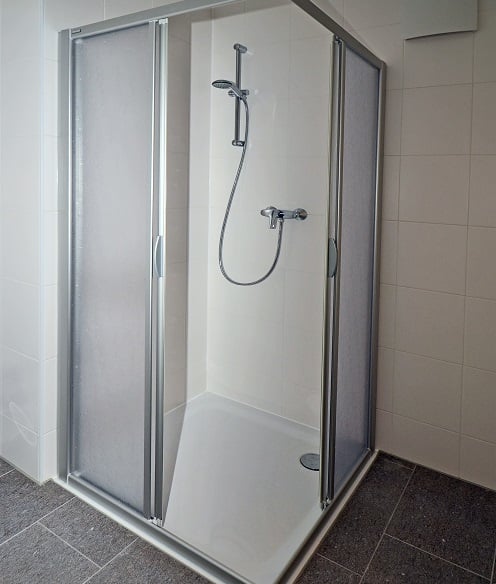
When you’re installing a fiberglass or acrylic shower liner enclosure (not to be confused with a shower curtain) and base over a concrete floor, special considerations should be taken to minimize leaks. Ideally, you’re putting it in an area where a drain has already been roughed in. If not, you will need to run a new drain line through the concrete, a job that you should consider hiring a plumber to tackle.
- Make sure the drainpipe sticks an inch or two above the concrete, with at least 1.5 inches of space between the concrete and the pipe so there’s enough space for the drain assembly, otherwise you’ll need to break through the concrete to extend the pipe or chisel the floor to create enough space around it.
- Line the drain pipe up with the drain hole in your shower base, and use that to guide the location of your stud walls to support the rest of the enclosure.
- Frame the walls, then add a leakproof drain assembly like a no-caulk shower drain.
- Clean the flooring to remove any debris, and apply a water sealant before installing the base as normal.
Ready to start your Shower Pan Installation?
Find ProsReturn to Top
DIY Considerations & Tips
For homeowners with some plumbing know-how, this is a do-able DIY project. However, anyone doing a shower remodel or installing a new shower needs to consider important details to make sure the process goes smoothly and everything gets done correctly. For example:
- Use an abundance of caution: Working with water can be messy. Give the subfloor extra protection while you work by paying a plastic shower curtain down to catch any leaks while you work.
- Choose a pan with a drain hole that aligns neatly with your pipe: Fewer headaches and effort will be required once you start connecting all the plumbing.
- Caulk is your friend: Caulk around the drain and the perimeter where the wall and base meet once you install the shower pan.
- Check your work: After attaching the drainpipe, fitting the pan in place and attaching all the connections, run the shower to check for any leaks. Also, let the water run with the drain stopped to make sure the water level holds.
- Professionals are just a call away: If the process becomes overwhelming, consult with professionals to get the project back on track. While the cost of shower installation will increase with the use of a contractor, many homeowners find it well worth the cost to have the base and plumbing added properly the first time to avoid costly water damage repairs.
Using a pro for this project may help you avoid potentially costly issues like leaks and water damage that could occur in the future. Additionally, contractors can install your shower doors and walls at the same time, which could save valuable time in completing the project so you can use your shower sooner.
 How to Build a Custom Tiled Shower Pan
  Bathroom Shower Remodeling Tips
  3 Bathroom Remodels You Can Afford RIGHT NOW
  Corner Bathroom and Kitchen Sinks
  Customize Your Toilet with a Bidet Faucet

We have installed a 5′ x 3′ fiberglass shower basin. The corner, not connected to the wall, is popping up. we’ve already sealed it down and attached it too two walls.
We tried liquid nails, didn’t work. I’m thinking once the tiles on the floor and the shower doors on it, it’ll stay down???
Marian,
Just a guess, but it sounds like inadequate support under the base is causing it to buckle under pressure. Sinc the other parts are attached to the wall, the only place it has room to give is the corner you mentioned. Was the floor completely level? Did you use a sand mix bed for leveling?