Though the theory of basic wallpaper installation is pretty easy to grasp, many homeowners who have tried their hand at this task have found out the hard way that reading instructions and actually putting up wallpaper are two different things. Of course, the benefits of wallpaper are numerous enough to make giving this job a try worth the effort; if you want to install wallpaper, here are a few wallpaper installation tips, as well as some facts and instructions that will make the job go a bit smoother.
Benefits of Wallpaper
Wallpaper and paint are the two most common wall-coverings out there, and both have their pros and cons. While paint is relatively easy to apply and often inexpensive, the benefits of wallpaper are just as practical. Wallpaper comes in many different varieties, and some are more appropriate for specific situations. Vintage wallpaper, for example, is notorious for being difficult to install and near impossible to replace, so you probably don’t want to spend a bundle putting it up in a high-traffic house or a high-moisture area. On the other hand, some newer wallpaper varieties are extremely affordable, designed for do-it-yourself installation, and can be scrubbed and scoured often, making them a better option than paint in many areas.
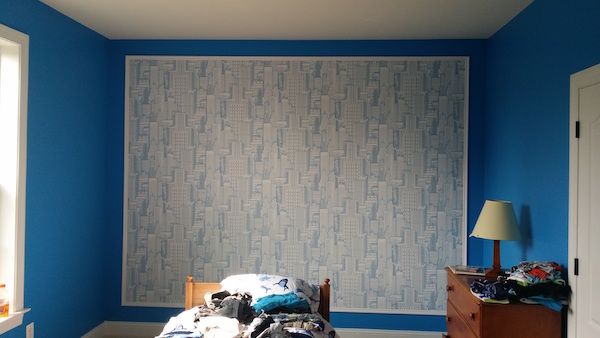
Of the many benefits of wallpaper, probably the most enticing is the wide range of patterns and styles available. From classic fabrics to playful kids’ patterns to stylish modern designs, wallpaper offers a room texture and an appearance that paint simply cannot duplicate. No matter what kind of room you are looking to alter, you can bet there’s a wallpaper that will fit the bill perfectly!
Basic Wallpaper Installation: Tools and Wall Preparation
Wallpaper installation requires you have a number of materials on hand in order for the process to progress along smoothly. Just to name of few of the necessary materials, you’ll need spackle, sandpaper, scrapers, a seam roller, a smoothing brush, a razor knife, and of course wallpaper and adhesive.
The most important step in basic wallpaper installation is surface preparation. Do not cut corners here for any reason! Make sure the wall is absolutely clean to start with, and that all holes or blemishes have been repaired and smoothed over with spackle, then sandpapered. If your wall already has wallpaper on it, you’re better off removing it before you start than just putting up a new layer over the top. The moisture and weight of your new wallpaper can easily cause the previous layer to come loose during installation, meaning all the work you’ve done up to that point will have been for naught. And if your walls are painted, beware of glossy finishes. It’s worth your time to cover them with a coat of primer paint before you paper, since glossy finishes can prohibit the new wallpaper from adhering properly.
Basic Wallpaper Installation: Cutting and Hanging
Care must be taken to cut the paper to the right lengths to ensure proper coverage. Measure carefully, giving yourself at least a 2″ overlap at the ceiling and floor just to be safe, as it’s much better to trim off a little extra later than to apply a section that doesn’t quite meet at the top and/or bottom.
Once your pieces are precisely trimmed, it’s time to start hanging. If you’ve purchased self adhering wallpaper, make sure you follow instructions and soak it long enough, and also make sure you let it cure after the soak long enough for the adhesive to get into prime form. The first piece you hang is the most important, and any mistakes made in getting that first piece up straight are going to get more and more obvious as you work your way down the wall. Use a level to make sure that first piece is going up plumb, and don’t use the corner of the wall as your guide, as they can be surprisingly crooked. Gently smooth out your first piece with your smoothing brush, removing any bubbles underneath the paper and repeat the process until you reach the other end of the wall.
Ready to start your wallpaper installation?
Find ProsWallpaper Removal
Despite the benefits of wallpaper, there are many homeowners who are far more concerned with removing the wallpaper they have rather than putting more up. Wallpaper removal is decidedly easier than wallpaper application, but if you’re not careful, it could actually cause more damage to your walls!
The most important thing to remember about wallpaper removal is this: taking your time is the key to success. Rushing wallpaper removal is likely to pull away more than paper from the wall! If you don’t feel like replacing your drywall after you remove wallpaper, you have to take it slow. Some wallpaper adhesives may require a special solution to release the paper, but in most cases, ordinary water will do the trick. Some particularly tough water-based adhesives require that you soak the wallpaper to loosen it up, but for most scenarios, a rented steam machine will loosen paper enough to gently come away. Never pull away wallpaper straight down; loosen an upper corner and pull the paper away at an angle, applying more steam or water as needed.
Professional Wallpaper Installation and Removal
As you can probably tell, both wallpaper installation and wallpaper removal are more delicate tasks than they might first appear. However, professionals make both of these jobs seem easy! Often, when you add up the materials you’ll need, the tools you’ll have to purchase or rent, the time it will take you, and the possibility of wall damage, hiring a professional for either of these jobs makes a lot of sense. Since professional wallpaper installation is fast, and professional wallpaper removal is even faster, the labor hours (and therefore the bottom line price) is often extremely affordable, and can save you plenty of hassle.
 Decorative Moldings: The Perfect Cover-up
  Wood Veneer: An Upside to Being Shallow
  Ceiling Mirrors – Considerations, Types & Options
  The Basics of Ceramic Wall Tile Installation
 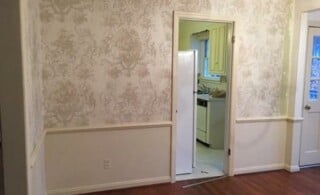 Wallpaper Prep

Are You Familiar With This Topic? Share Your Experience.