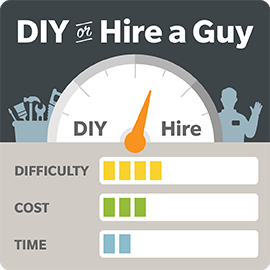
 Use this guide to help you decide whether you should DIY or hire a guy for your door installation project.
![]()
![]()
Materials Required:
- New Door
- New Hinges
- Screwdriver
- Tape Measure
- Hammer
- Safety Goggles
Is it time to replace your door? Whether it’s beat up or simply out of style, replacing an old door is an easy makeover.
Steps for Installing a New Door
- Measure the old door and hinges to makes sure the new door fits the existing space.
- Using a screwdriver and hammer, remove the pins from the hinges to release the old door from the frame.
- Align the new door to the old hinges and replace the pins to install the new door
HomeAdvisor Tip:
If the latch doesn’t sit flush, chisel out wood from the door to change the depth.
Doors are beautiful, functional fixtures that welcome guests into our homes and protect us from weather and unwanted visitors. One of the most stressful things a homeowner can encounter, however, is a dilapidated door coming off of its hinges, tearing at the surrounding wall frame, hanging incorrectly, or simply not functioning the way it should.
While you can always call your local contractor for assistance, it’s also possible to install a new door yourself. It may seem like an intimidating process at first, but a pre-hung door is actually a breeze to install with the right tools and mindset.
Difference between Pre-Hung and Slab Doors
When you visit your local home improvement store, you’ll likely be met with two options for DIY door installation. The first is the price-friendly slab door and the other is the pre-assembled or pre-hung door. Both are great options depending on your handyman skills and budget, but we’ll be focusing specifically on pre-hung doors in this article.
If you go with a slab door, you’ll be responsible for all of the framing and measurements that go along with installation. Although the price tag may look appealing, you’ll be making up those costs in labor and equipment.
On the other hand, a more expensive pre-hung door is ready for installation in its own frame. In most cases, a pre-hung door is well worth the extra initial investment, as it can speed up and simplify the installation process significantly.
Tools You’ll Need
A pre-hung door takes between four and six hours to install and the process is moderate in difficulty. The tools you need for this project include:
- 15 #8 screws, 3 inches long
- 16d finishing nails
- Caulk
- Caulking gun
- Drill and bits
- Fiberglass or foam insulation
- Hammer
- Level
- Phillips screwdriver
- Pry bar
- Reciprocating saw
- Tape measure
- Utility knife
- Wood shims
How to Choose a New Door
Before you start ripping out the old door, you’ll already want to have the new one ready to go. There are a few things you should do before purchasing a new door:
- Take all measurements for height, width, and depth of the door opening.
- Ensure the new door is ½” less than the height and ¾” less in width than the rough opening.
- Determine the direction you want the door to open.
- Select the right material for your new door.
- Remove the interior door trim and save for reinstallation.
How to Install a Prehung Door
After removing your existing door, taking care not to damage the wall frame, it’s time to install your new door.
- Double check to ensure the door fits with a dry-fit.
- Measure the subsill area where the door will sit to confirm it is level and square. Use wood shims to adjust as needed.
- Measure the door from the bottom of the sill to the floor to verify clearance.
- Apply a bead of caulk approximately 1” from the front of the subsill and 1” from the back of the rough opening using a zigzag pattern for weatherproofing.
- Working from the outside in, place the bottom of the door against the opening and raise the frame into place.
- Place temporary shims near the top of the frame to hold the door in place.
- Adjust the doorframe to ensure it is square and plumb in the opening and insert shims between the frame and studs at the hinges to keep it level. There should be 1/8” clearance between the rough frame and jamb.
- Insert screws through the shims and hinges, paying attention to the manufacturer’s instructions.
- Insert shims near the jamb’s top and bottom on the side of the door with the lock.
- Insert screw through the shims and jamb.
- Ensure there is adequate and even spacing around the doorjamb. From the outside, there should be 3/8” to ½” between the door and the jamb stop.
- Add any additional shims around the frame and lockset following the manufacturer’s instructions and remove any lingering shipping braces.
- Try opening and closing the door, ensuring that it swings freely and evenly, and make adjustments as needed.
- Secure any extra shims with screws.
- Use a utility knife to score the shims, snapping off the excess pieces.
- Secure the sill using the manufacturer’s instructions.
- Apply spray foam insulation in frame gaps and let dry, being careful not to get any on your skin.
- Once dried, use a putty knife to remove excess insulation.
- Reattach the interior door trim.
- Apply fresh paint or stain if the door isn’t already pre-finished.
With a little hard work and patience, you’ll be able to install your new pre-hung door in no time.


Are You Familiar With This Topic? Share Your Experience.